This function allows you save time by importing multiple shipments at once using a CSV or Excel file instead of entering each shipment manually.
Before you start
Supported file formats:
- CSV (.csv)
- Excel (.xlsx, .xls)
- Tab-separated values (.tsv)
What you'll need in your file:
- Recipient's name
- Street address
- City name
- Postal/ZIP code
- Country code (e.g., LV, EE, LT)
- Phone number with country code
- Package Information:
- Length in cm
- Width in cm
- Height in cm
- Weight in kg
💡 E-commerce platforms like Shopify, offer order export, so you don't have to create this information manually.
💡 You can download a template from Swotzy, which is available inside the feature.
Step 1: Access the File Upload Feature
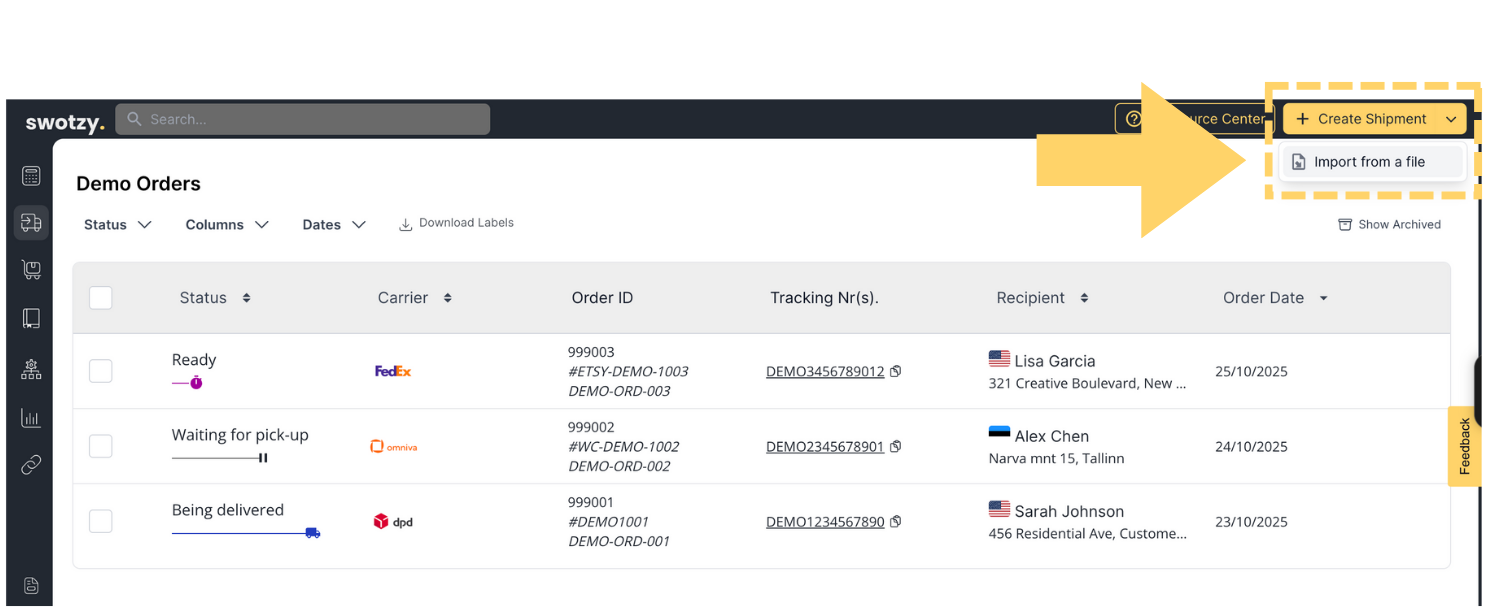
→ 1. Log in to your Swotzy account
→ 2. Click the + Create Shipment button's arrow (top-right corner)
→ 3. Click the arrow next to the button to expand options
→ 4. Select Import from a file
→ 5. To upload your file, click on the field: Drop files here or click to upload, or drag and drop the file from your computer.
Alternatively, you can click on the blue text - Or click here to copy and paste table data - to paste information from your file.
💡 At the top left, by clicking on the upload-example.csv button, you can download an example with input information.
Step 2: Select the header rows
After uploading, you'll see a preview of your file.
Identify which row contains your column headers (e.g., "Name", "Address", "City", etc.)
💡 Why this matters: The platform needs to know which row contains your field names (not data) so it can map them correctly.
Once you have selected the correct row, click on the blue Next button.
1. Check if all the values from the uploaded file have been correctly matched to the appropriate fields in the platform. Make necessary adjustments by selecting different column values from the uploaded file.
2. Before completing the upload, verify that all data and formats are correct. Make improvements if necessary.
3. After clicking the Submit button, wait for the data to be imported into the platform.
4. Upon completion of the data upload, a confirmation message Order saved will appear on the screen.
5. Proceed to the Shipment section to complete the shipment processing process.
Comments
0 comments
Please sign in to leave a comment.